TL;DR Hard Disk space can only be replaced with more Hard Disk space
Disclaimer: If you're doing things wrong described here you'll loose your data - create a backup first!
Nowadays it's casual to use VMs for development environments. It's also casual that projects grow and you run out of disk space inside the VMs. Luckily, on the host there's always enough space available which can be assigned to an existing VM (isn't it?).
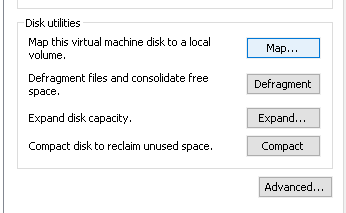
Expanding the partition in the VMware Hardware options / hard disk details is pretty easy. Just stop the VM, click the expand button and increase as required:
Now we have some more space for partitions in our VM but we want to increase the size of an existing partition. To manage the partitions, we're using GParted, which is available as bootable ISO-Image.
Assign the downloaded ISO in your VMware CD-ROM drive and boot from it. You can select the boot device if you hit ESC right after powering on the VM.
If the boot sequence is to fast, you can add this line to your VMs .vmx file:
bios.bootDelay = "2000"This will delay the boot sequence for 2000 ms and show the options.
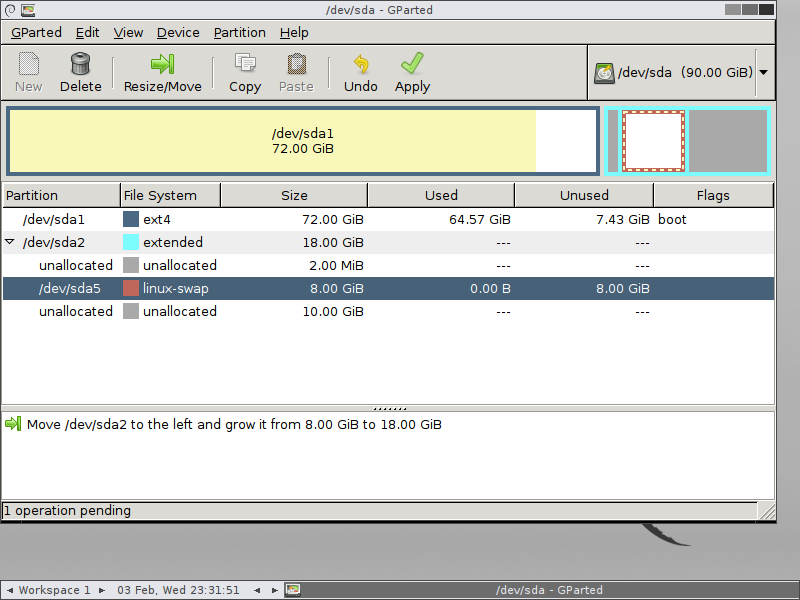
If you're running Ubuntu in your VM, it is likely that there might be a swap partition (/dev/sda5 here) between the main partition and the aforementioned created, unallocated new space and your partitions might look like this:
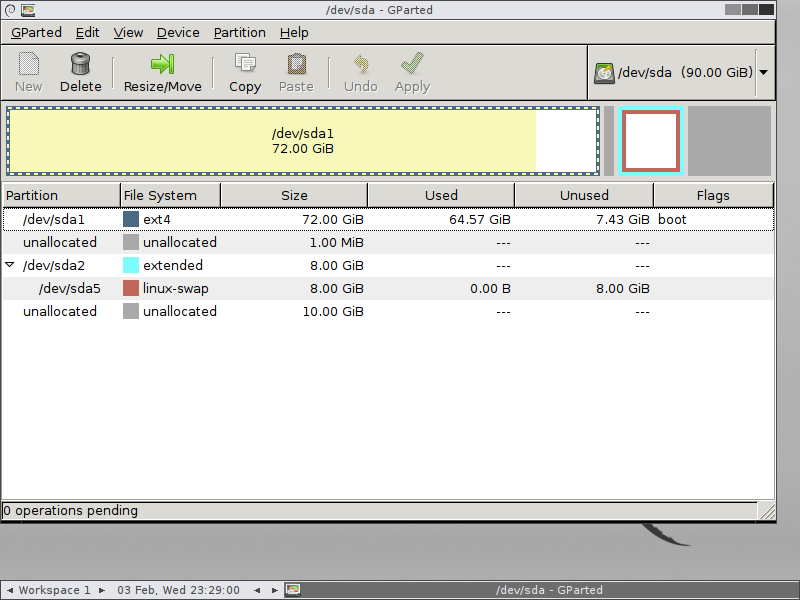
What we want to achieve now, is to merge the 10 GB unallocated space at the end of the list to the /dev/sda1 partition.
First, we'll select /dev/sda2 (NOT /dev/sda5!):
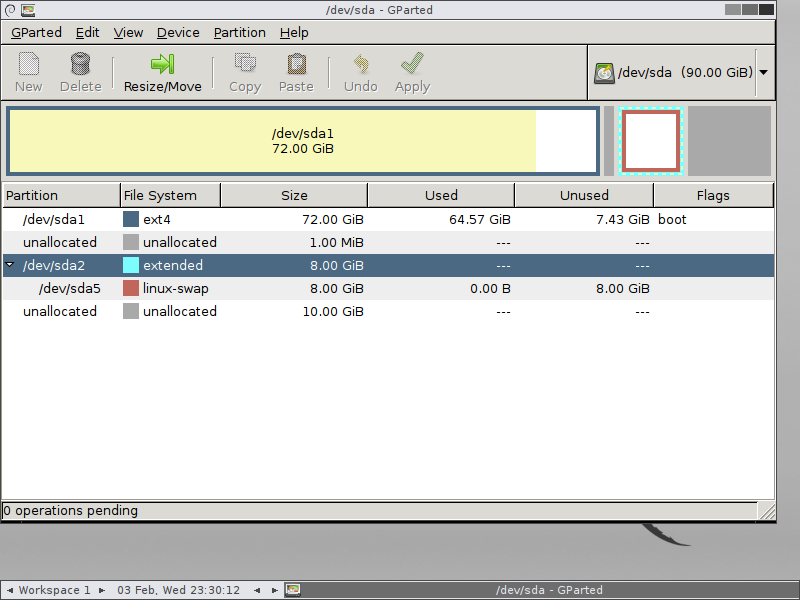
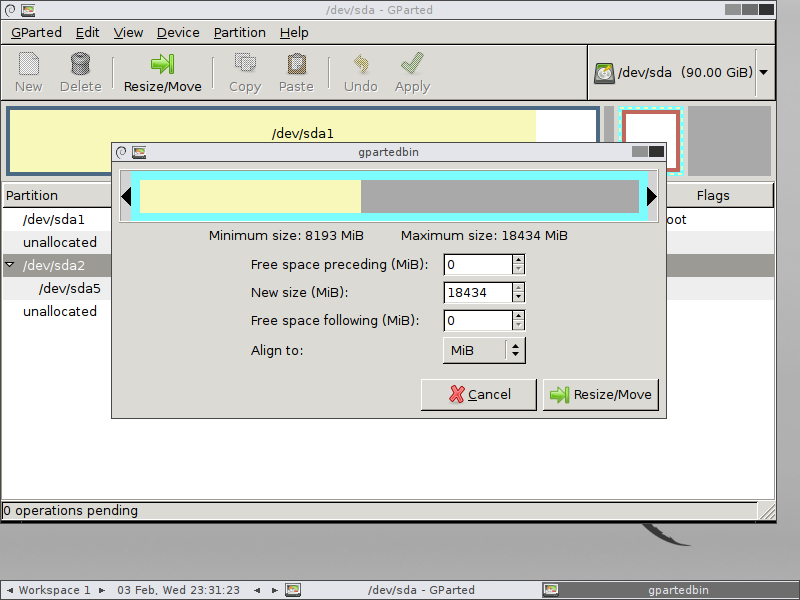
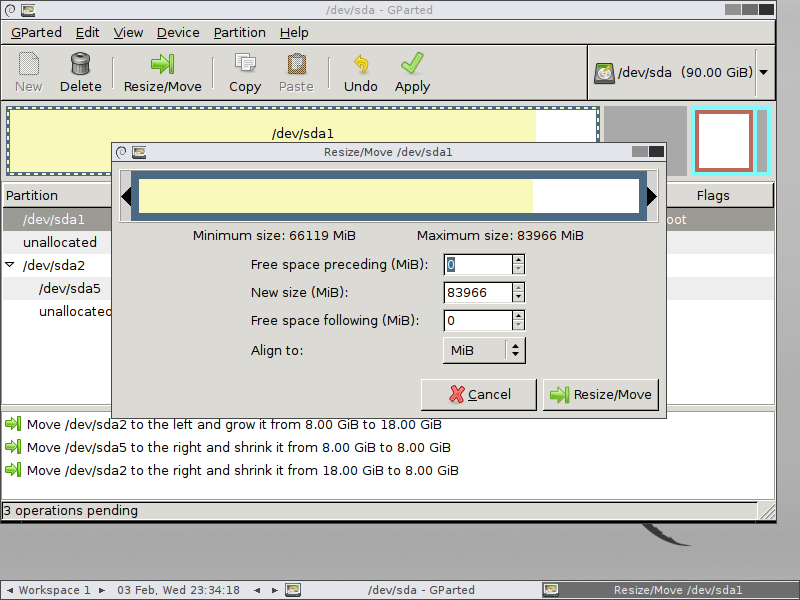
Then, we click "Resize/Move":
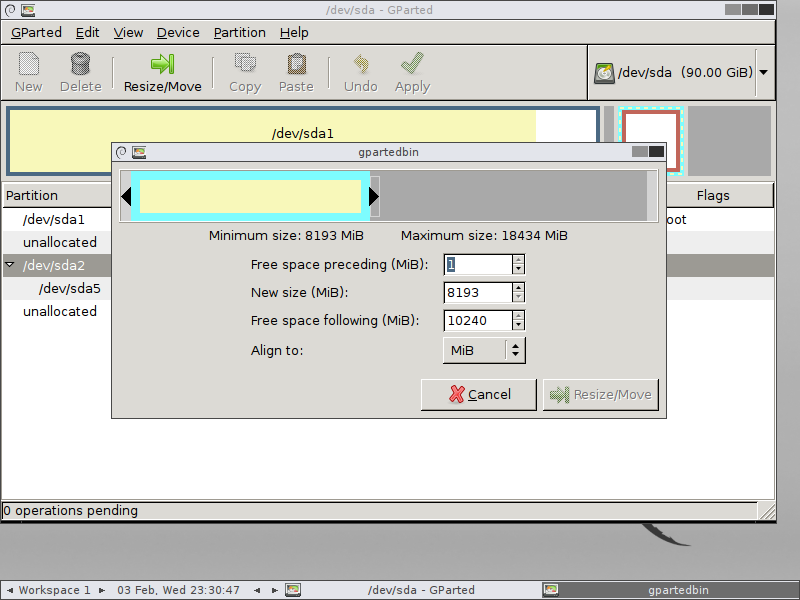
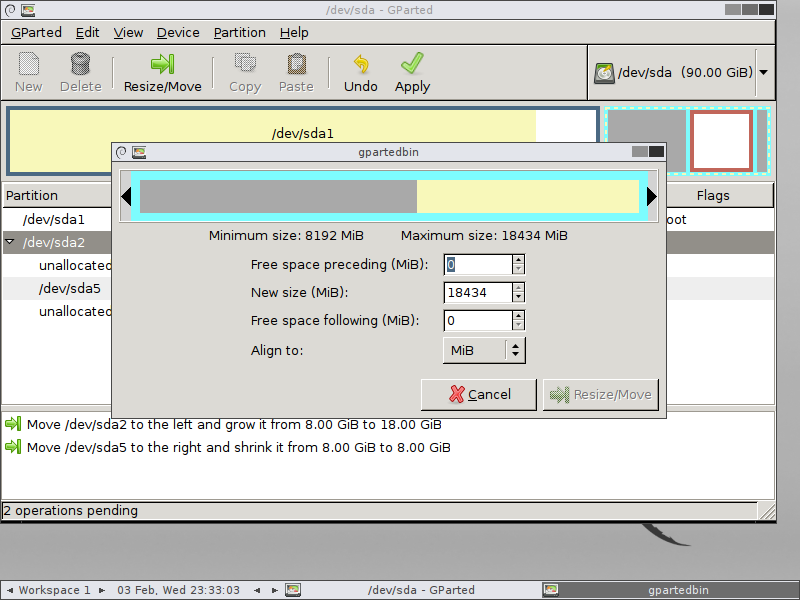
Next, we increase the size of /dev/sda2 to use all available space:
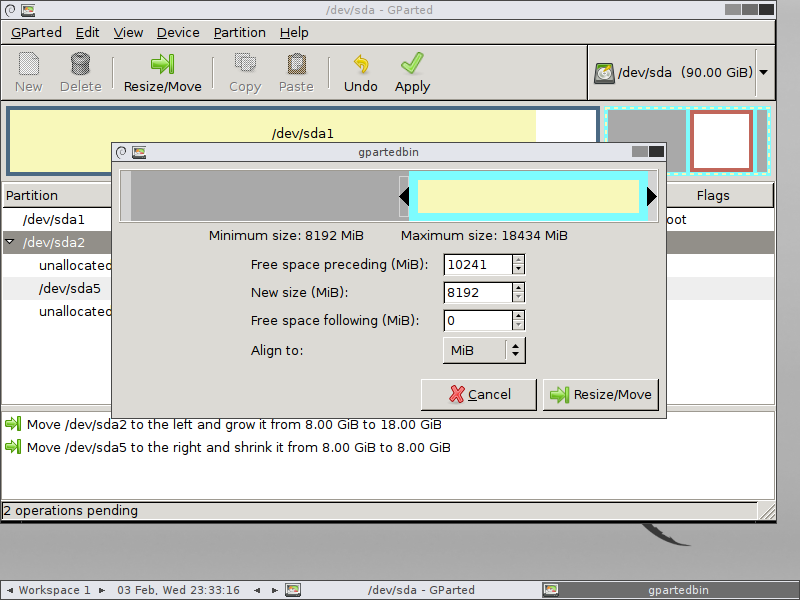
Now we select /dev/sda5 and click Resize/Move again:
In this step, we move /dev/sda5 inside /dev/sda2 to right end: 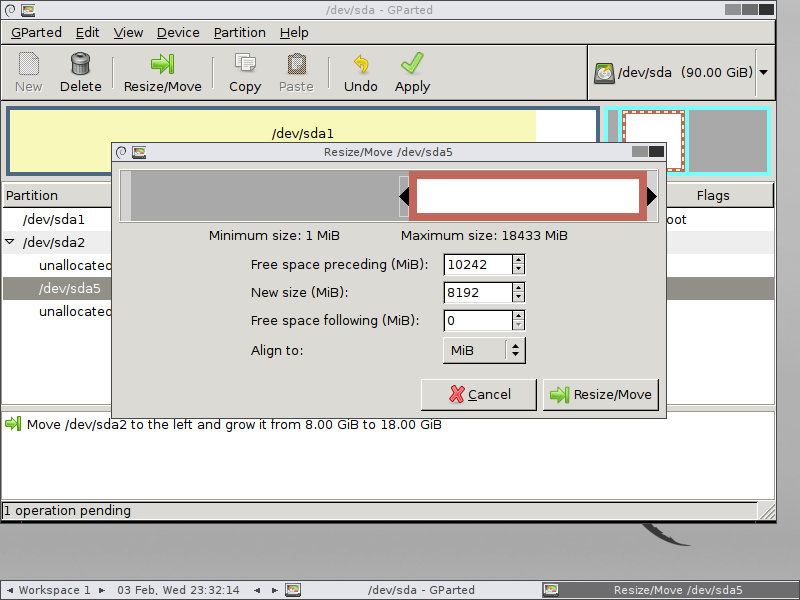
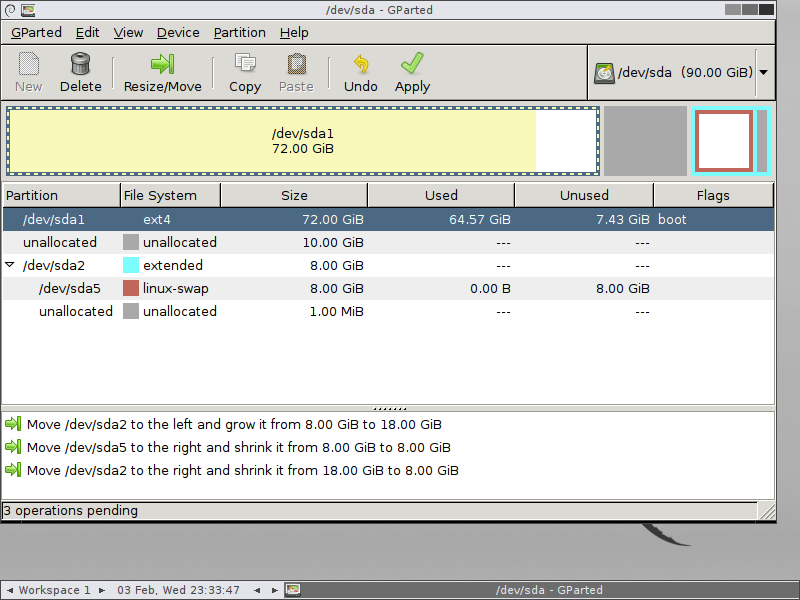
Then again, we select /dev/sda2:
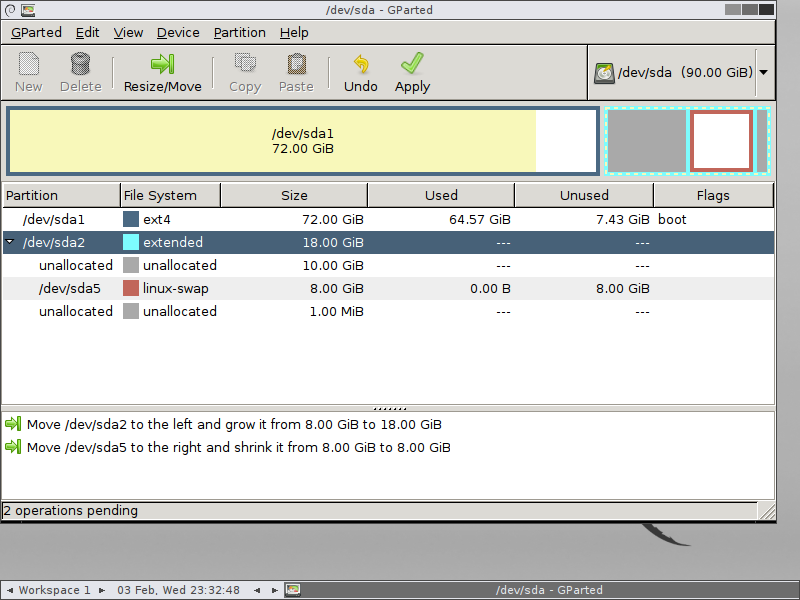
After clicking Resize/Move now we shrink /dev/sda2 to the size of /dev/sda5 by moving the left arrow to the right until it is blocked:
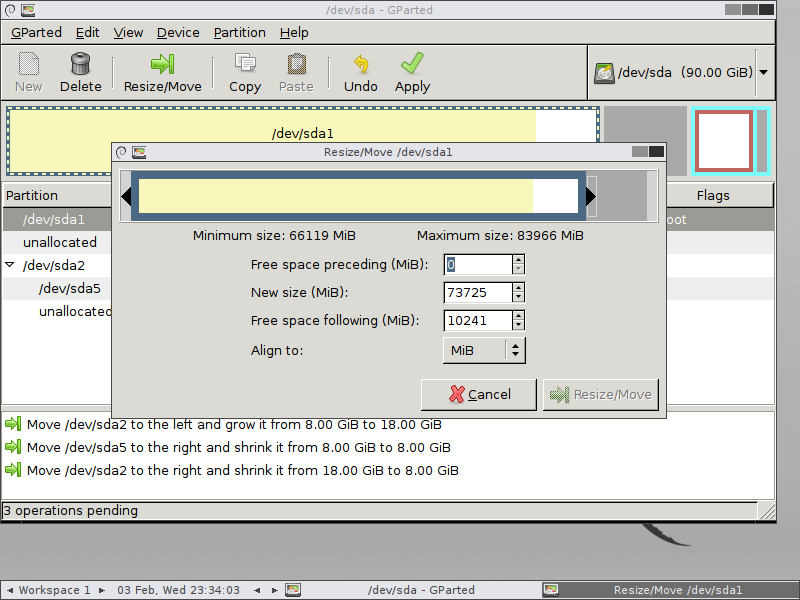
Now we select /dev/sda1 again:
After clicking "Resize/Move" again, we finally can expand /dev/sda1 to the right:
The final step is hitting the "Apply" button, confirm everything, cross fingers and wait for the operations to succeed.
As GParted already tells you in almost every step: Be careful with what you're doing and create a backup before you're trying to modify your partitions!