DigitalOcean recently announced the public availability of it's managed Kubernetes offering and it's pretty awesome.
Once you created your cluster following their quickstart, you might want to open the Kubernetes dashboard using kubectl proxy. But browsing http://localhost:8001/api/v1/namespaces/kube-system/services/https:kubernetes-dashboard:/proxy/ will result in a 404 error.
That's because the Kubernetes dashboard is not deployed by default, so let's do this now using:
kubectl create --kubeconfig="your-digitalocean-kubeconfig.yaml" -f https://raw.githubusercontent.com/kubernetes/dashboard/master/aio/deploy/recommended/kubernetes-dashboard.yamlBy the way, if you don't want to always specify the --kubeconfig parameter, you can merge your Cluster configuration into your local Kubernetes Config using this DigitalOcean CLI command (make sure to login first using your DO token) - and I'm assuming this for the next kubectl commands issued in this post:
doctl k8s cluster kubeconfig save <your-do-cluster-name>Once the configuration is merged, you can list the Kubernetes contexts by issuing this kubectl command
kubectl config get-contextsWhich will output a result similar to this:
CURRENT   NAME                                         CLUSTER                                      AUTHINFO                                           NAMESPACE
          do-fra1-k8s-1-12-1-do-2-fra1-xxxxxxxxxx   do-fra1-k8s-1-12-1-do-2-fra1-xxxxxxxxxx   do-fra1-k8s-1-12-1-do-2-fra1-xxxxxxxxxx-admin
*         docker-for-desktop                           docker-for-desktop-cluster                   docker-for-desktop
As you can see, the current active context is your local Kubernetes and if you want to issue commands against your DigitalOcean Cluster, you'll have to switch the context to this cluster by running
kubectl config use-context do-fra1-k8s-1-12-1-do-2-fra1-xxxxxxxxxxIf everything went fine, you should be able to list the Nodes of your DigitalOcean cluster:
kubectl get nodesFingers crossed 🤞, the output should be similar to this (except for the cluster name, of course):
NAME                   STATUS    ROLES     AGE       VERSION
eloquent-hypatia-h12   Ready     <none>    63d       v1.12.1
If you try to access your Kubernetes dashboard now by running kubectl proxy and logging in using your Cluster configuration yaml file, you'll get this error:
Not enough data to create auth info structure.
Read on, we're solving this now 💪!
Next, we need to create a Service Account and a ClusterRoleBinding using this serviceaccount.yaml file:
apiVersion: v1
kind: ServiceAccount
metadata:
  name: <ServiceAccountName> # replace this with the username you want to use
  namespace: kube-system
---
apiVersion: rbac.authorization.k8s.io/v1beta1
kind: ClusterRoleBinding
metadata:
  name: <ServiceAccountName> # replace this with the username you want to use
roleRef:
  apiGroup: rbac.authorization.k8s.io
  kind: ClusterRole
  name: cluster-admin
subjects:
- kind: ServiceAccount
  name: <ServiceAccountName> # replace this with the username you want to use
  namespace: kube-system
Then apply the serviceaccount.yaml using:
kubectl apply -f serviceaccount.yamlAfter that, we need to get the access token for the Service Account:
kubectl get secret -n kube-systemThis will give you a list like this:
NAME                               TYPE                                  DATA      AGE
csi-do-controller-sa-token-hsgv9   kubernetes.io/service-account-token   3         62d
csi-do-node-sa-token-vz7wk         kubernetes.io/service-account-token   3         62d
default-token-tw59l                kubernetes.io/service-account-token   3         62d
digitalocean                       Opaque                                1         62d
kube-dns-token-7zvjw               kubernetes.io/service-account-token   3         62d
kubernetes-dashboard-certs         Opaque                                0         4m
kubernetes-dashboard-key-holder    Opaque                                2         4m
kubernetes-dashboard-token-fxw8d   kubernetes.io/service-account-token   3         4m
<ServiceAccountName-token-xxxxx>   kubernetes.io/service-account-token   3         17s
Finally display your token:
kubectl describe secret <ServiceAccountName-token-xxxxx> -n kube-systemName: <ServiceAccountName-token-xxxxx>
Namespace: kube-system
Labels: <none>
Annotations: kubernetes.io/service-account.name=<ServiceAccountName-token-xxxxx>
kubernetes.io/service-account.uid=<some-uid>
Type: kubernetes.io/service-account-token
Data
====
ca.crt: 1156 bytes
namespace: 11 bytes
token: <here goes your token>When running kubectl proxy again, now you can enter your token in the login screen here:

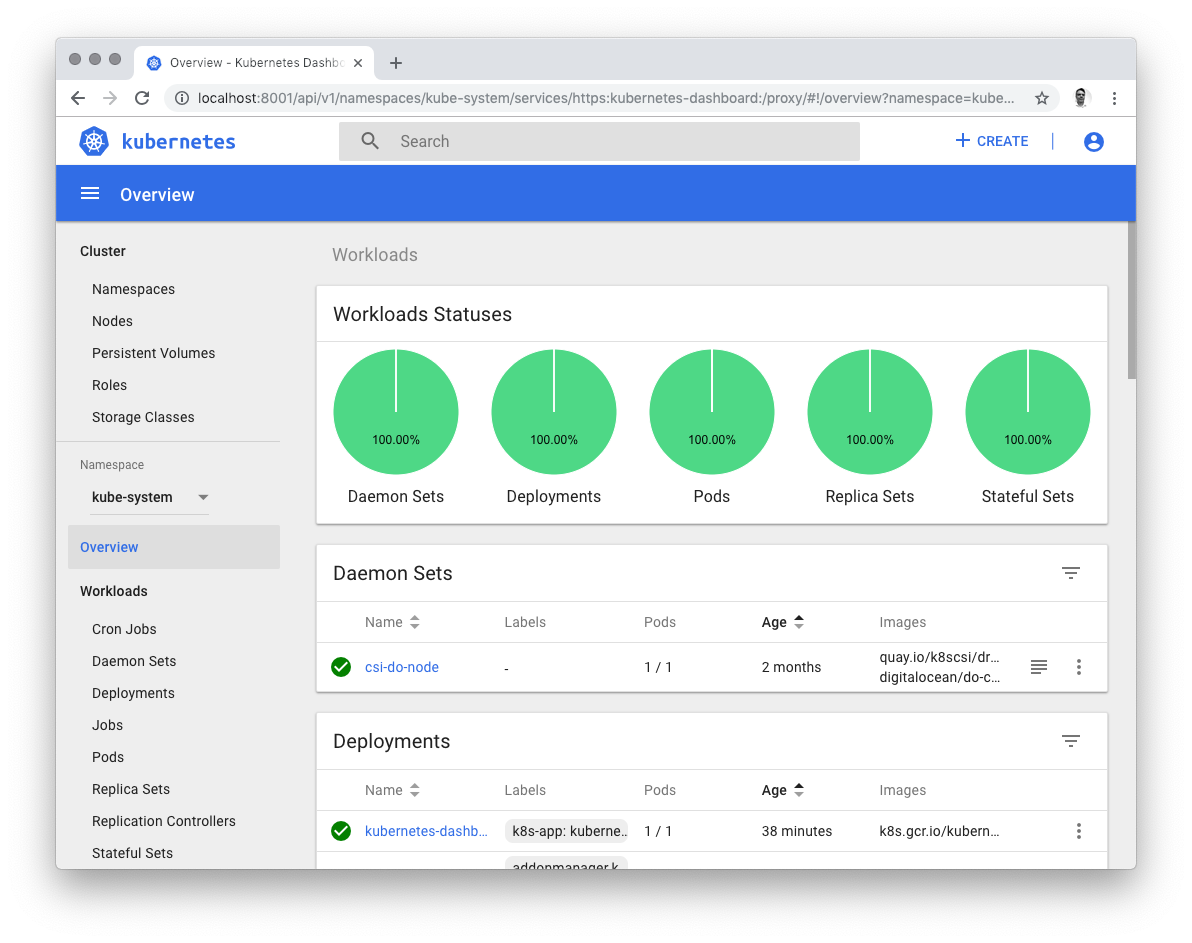
If everything went well, you should be able to browse the Kubernetes dashboard now: