Please consider the following scenario:
On my MacBook Pro I want to access a web application (SPA/PWA) and an API both running in Docker containers behind another nginx Docker container (reverse proxy managing SSL) from an iOS device.
So I have:
- 1 iOS device having IP
192.168.178.77 - 1 MacBook Pro having IP
192.168.178.64 - 1 Docker container running nginx having two
server_namesettings: app.dev and api.dev, both using self-signed SSL certificates.
The challenge: the're no option in the local Router to point DNS entries to 192.168.178.64.
/etc/hosts has these entries:
192.168.178.64 app.dev
192.168.178.64 api.dev
The easiest solution I've found is to use dnsmasq running in a Docker container.
So what is dnsmasq?
Dnsmasq is a lightweight, easy to configure, DNS forwarder and DHCP server. It is designed to provide DNS and optionally, DHCP, to a small network. It can serve the names of local machines which are not in the global DNS. The DHCP server integrates with the DNS server and allows machines with DHCP-allocated addresses to appear in the DNS with names configured either in each host or in a central configuration file. Dnsmasq supports static and dynamic DHCP leases and BOOTP/TFTP for network booting of diskless machines
In order to start dnsmasq in Docker container, simply run this command:
docker run \
	--name dnsmasq \
	-d \
	-p 53:53/udp \
	-p 5380:8080 \
	-v /opt/dnsmasq.conf:/etc/dnsmasq.conf \
	--log-opt "max-size=100m" \
	-e "USER=foo" \
	-e "PASS=bar" \
	jpillora/dnsmasq
This will run dnsmasq mapping a configuration from /opt/dnsmasq.conf into the container.
Make sure /opt/dnsmsq.conf at least contains this line:
address=/dev/192.168.178.64
This will route all traffic to *.dev to 192.168.178.64.
dnsmasq will also inspect your local /etc/hosts file and route traffic appropriately.
It also provides a simple UI where you can verify your hosts file got hooked up correctly: Just browse to http://localhost:5380 and enter the credentials foo and bar from the docker run command above.
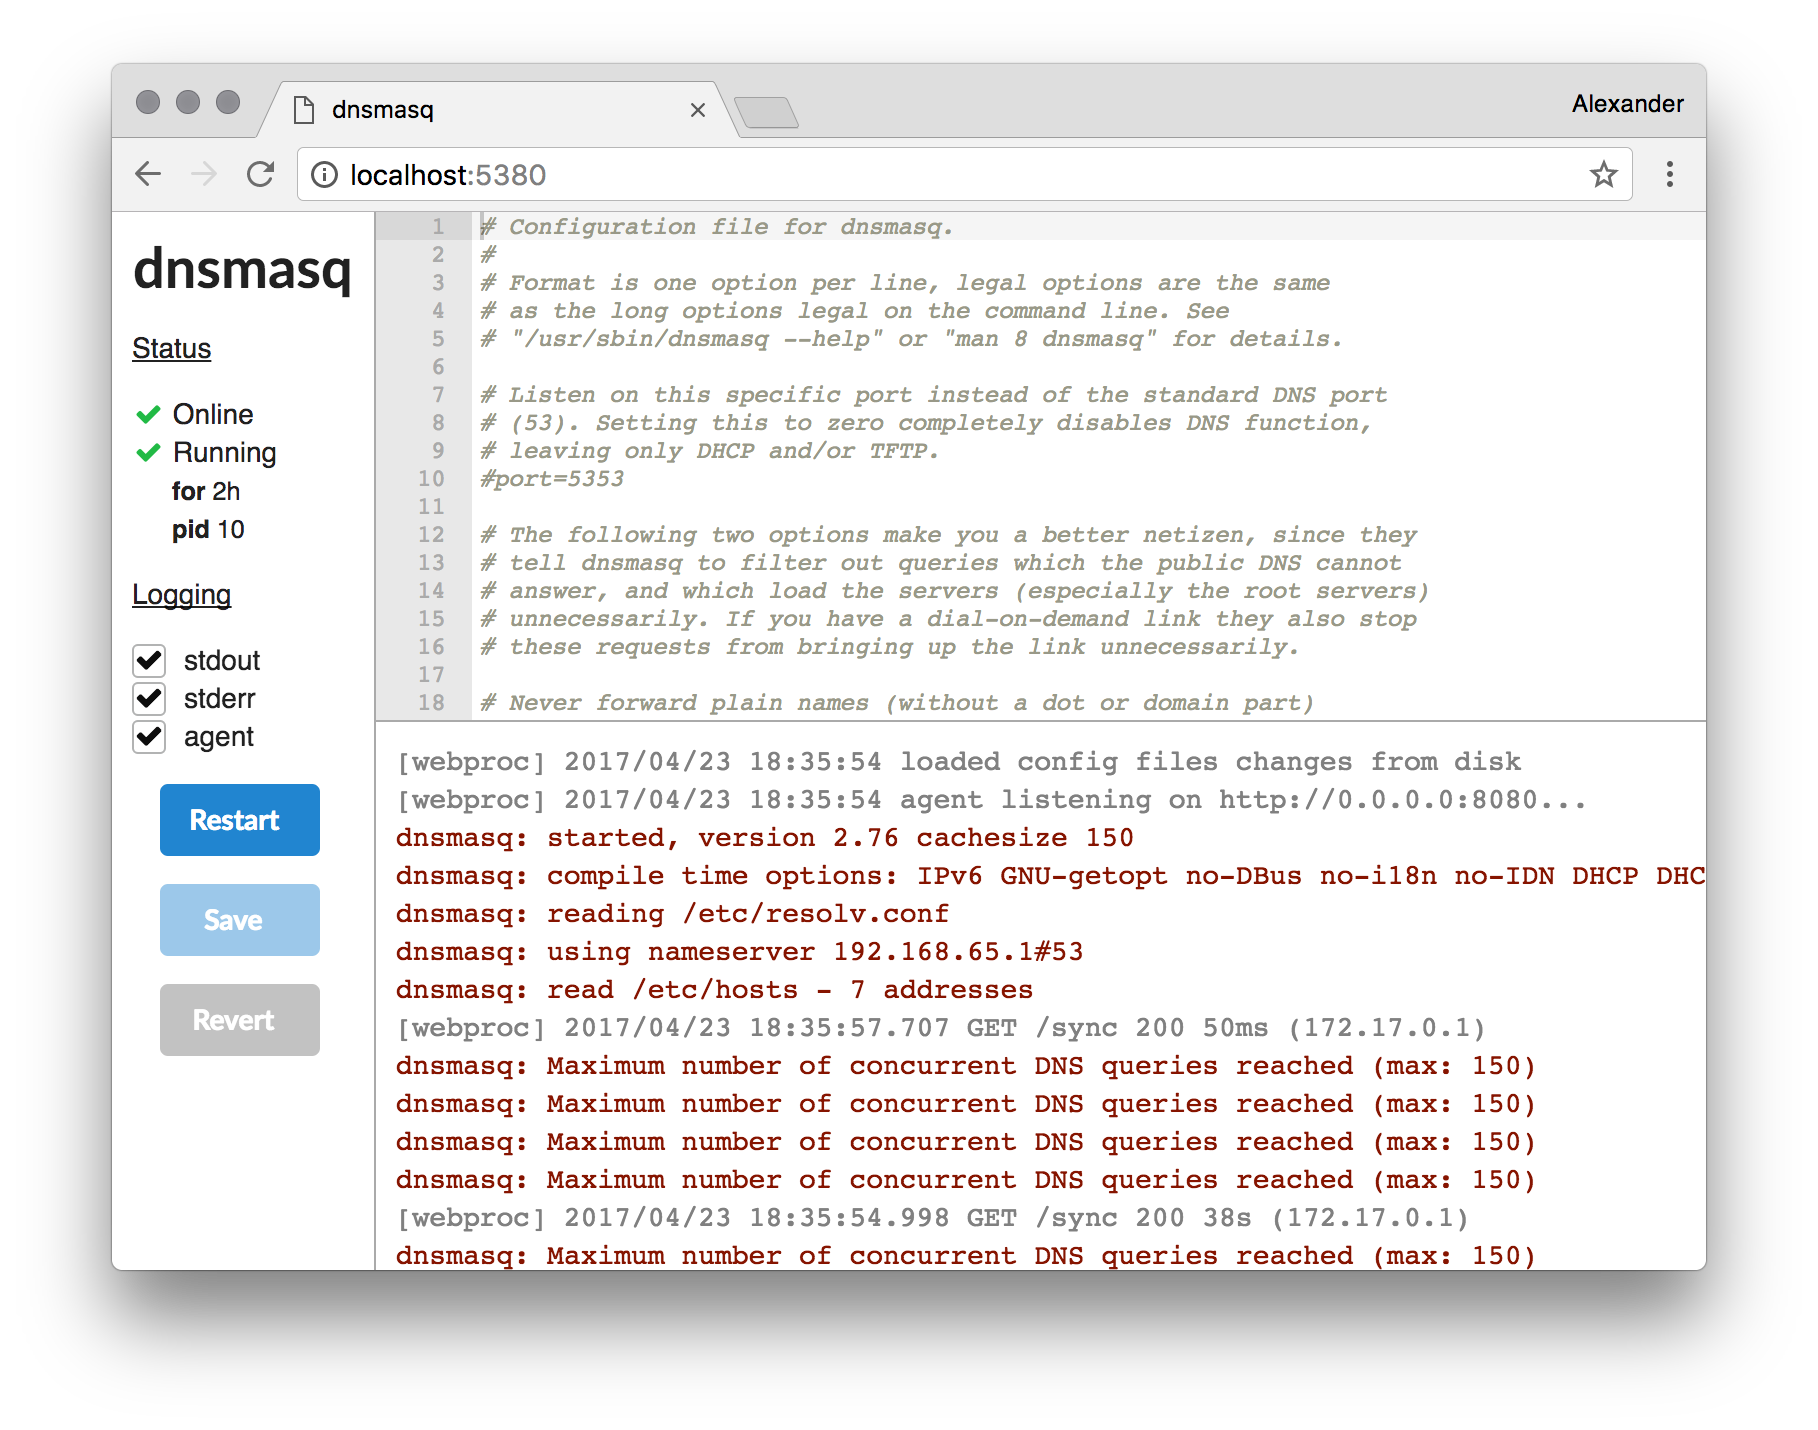
The UI output should look like this:
[webproc] 2017/04/23 18:35:54 loaded config files changes from disk
[webproc] 2017/04/23 18:35:54 agent listening on http://0.0.0.0:8080...
dnsmasq: started, version 2.76 cachesize 150
dnsmasq: compile time options: IPv6 GNU-getopt no-DBus no-i18n no-IDN DHCP DHCPv6 no-Lua TFTP no-conntrack ipset auth no-DNSSEC loop-detect inotify
dnsmasq: reading /etc/resolv.conf
dnsmasq: using nameserver 192.168.65.1#53
dnsmasq: read /etc/hosts - 7 addresses
The next step is to update the DNS settings on the iOS and macOS devices.
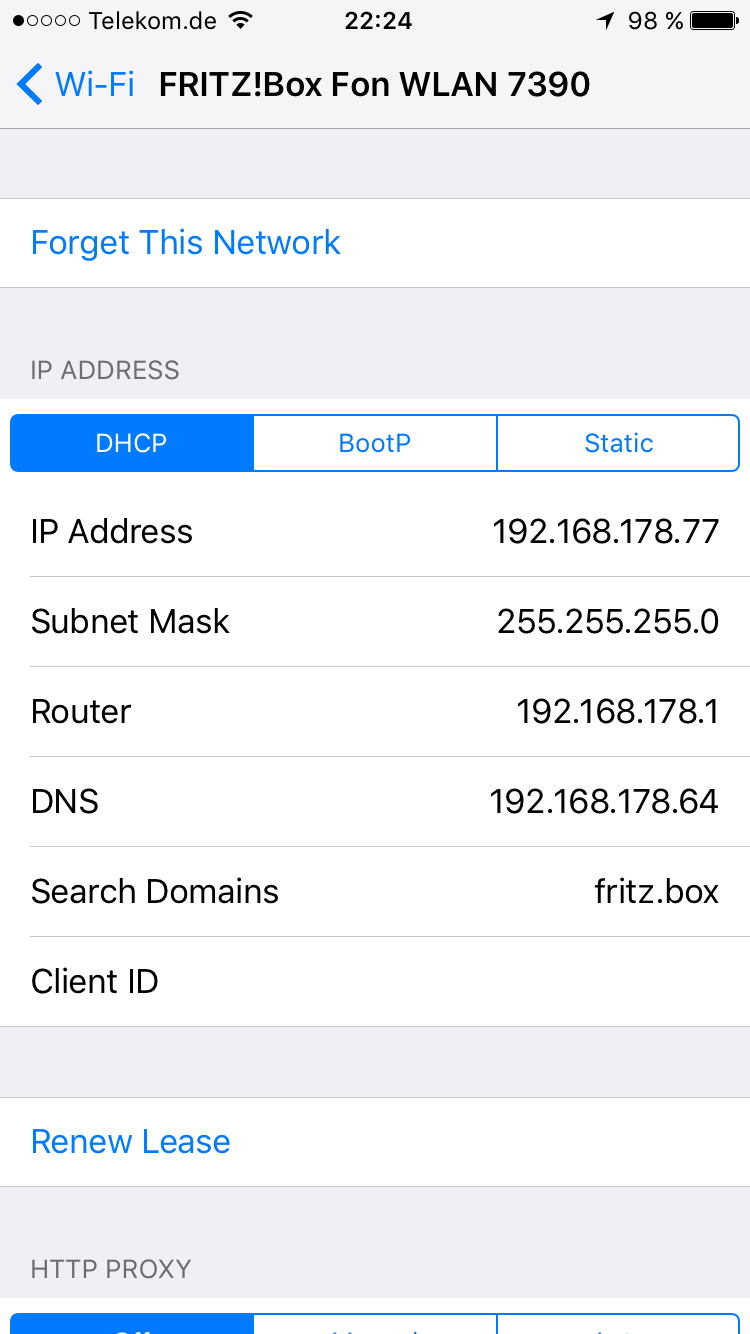
The iOS device has to point to the IP address of the macOS device:
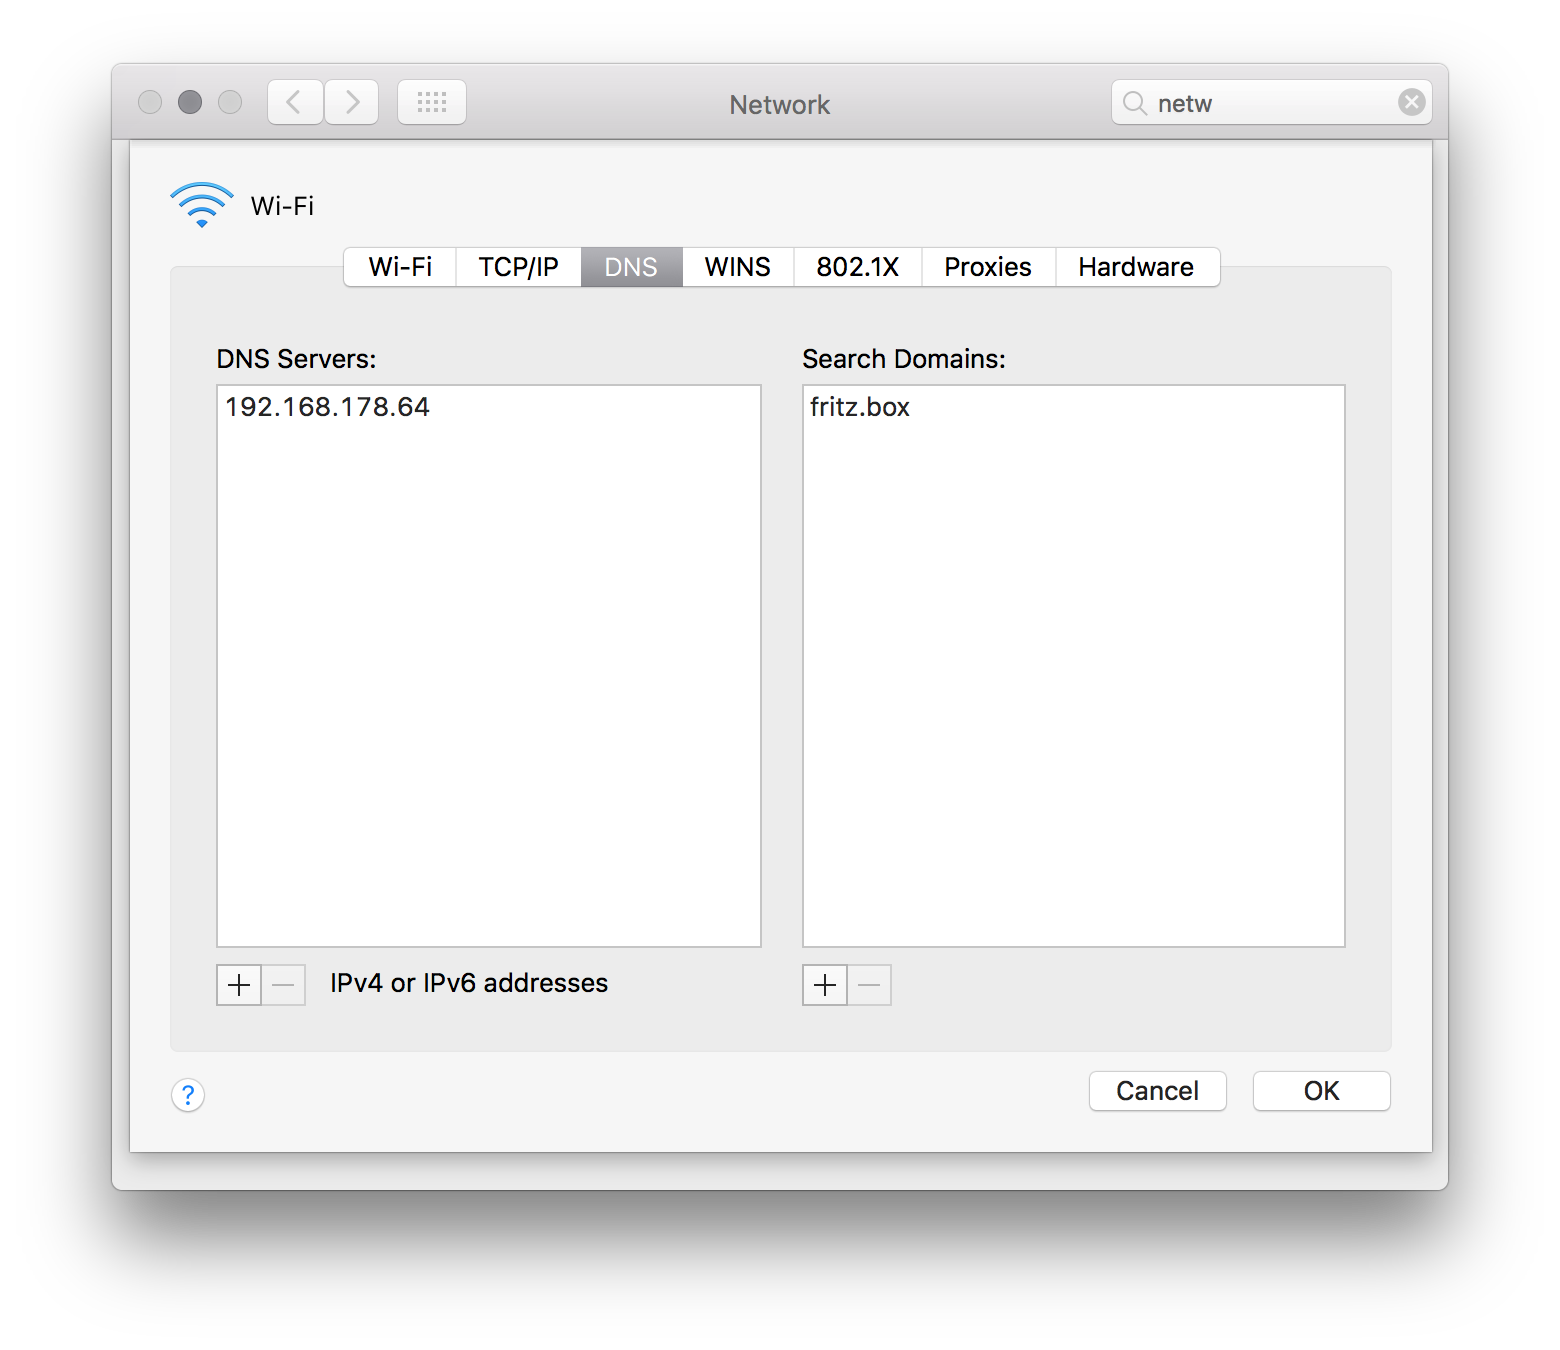
The macOS device has to point to itself:
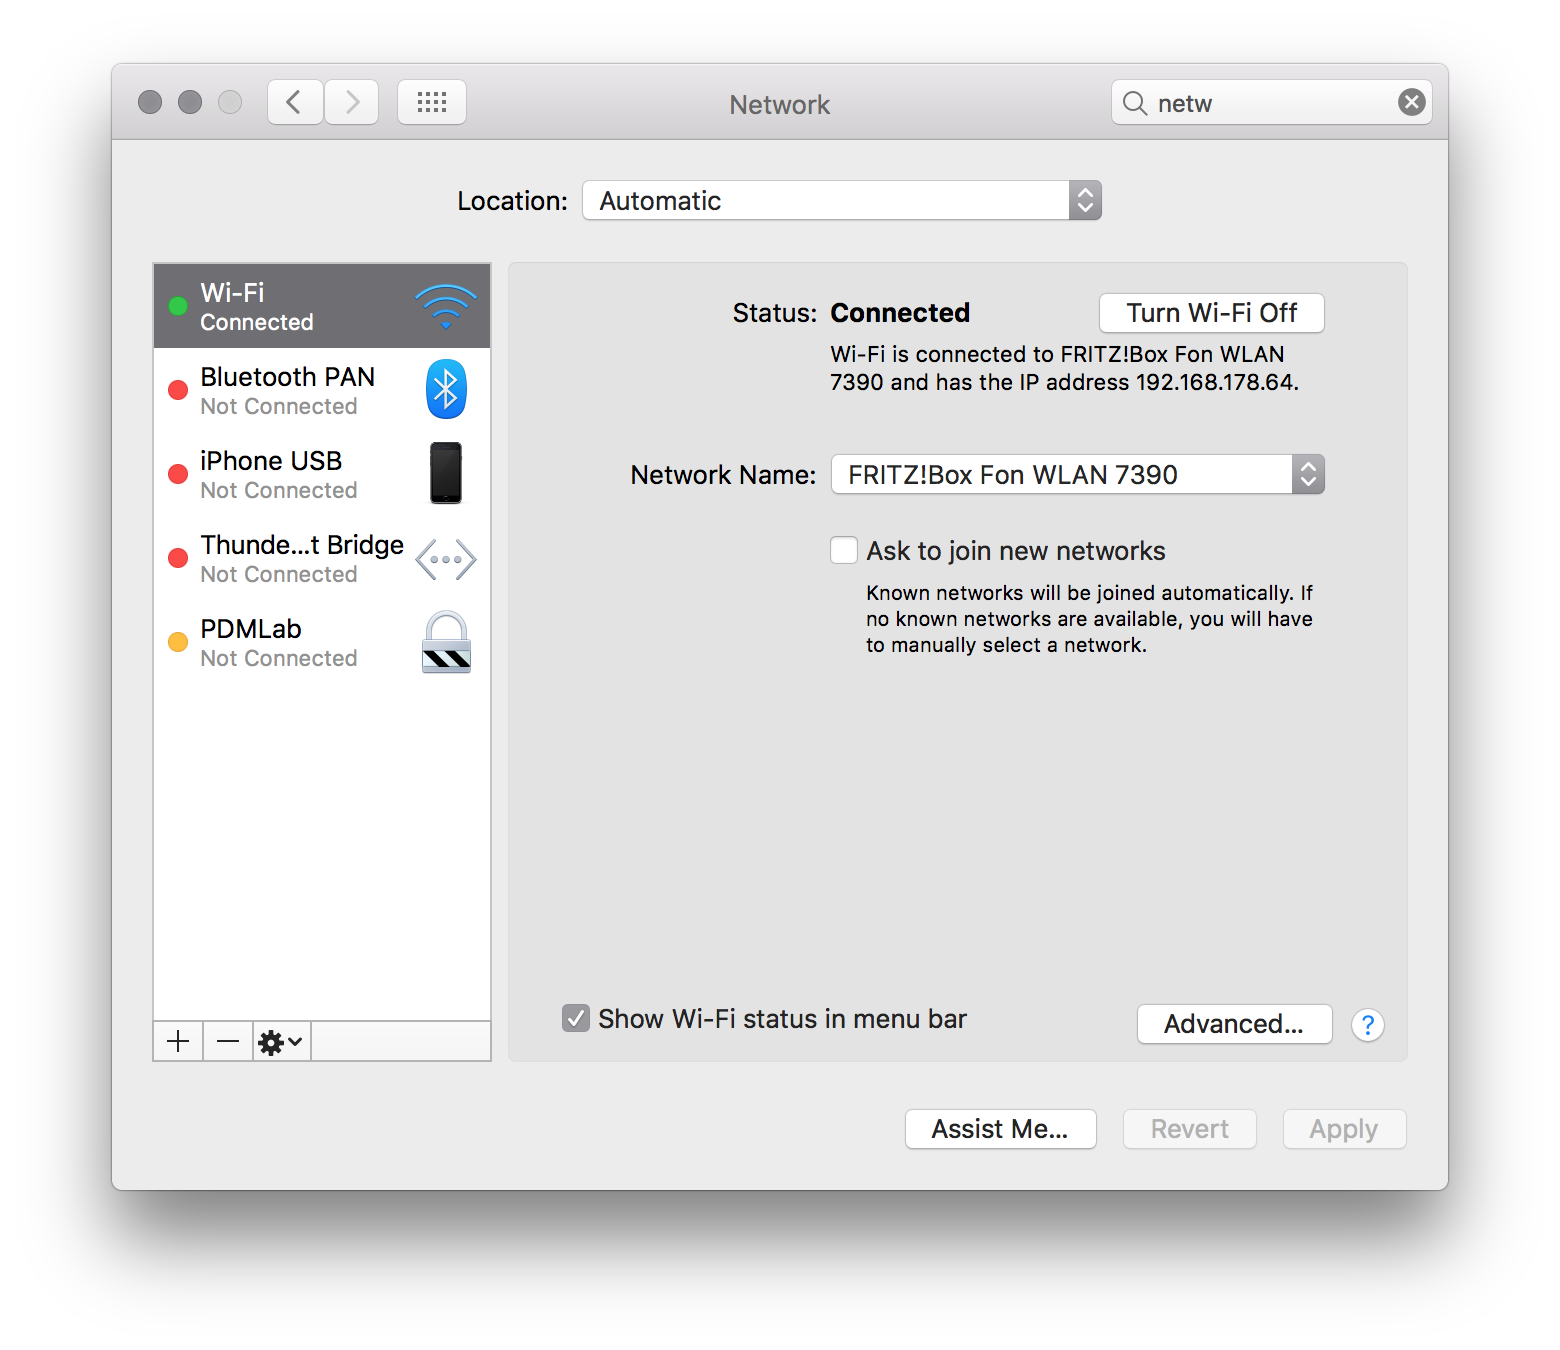
Click "Advanced...", then select "DNS":
The last step is to call the https://app.dev and https://api.dev URIs on the iOS device and confirm the SSL warnings.
Other solutions to this seem to be http://xip.io/ or http://nip.io/ but I didn't try them...
Happy developing!