Setting some context...
Disclaimer: this post is based on Visual Studio 2015 RC, DNX beta 4 and Azure SDK 2.6 and might become obsolete (hopefully pretty fast).
At Build 2015 "The Lesser Scotts" have been showing how to create a Azure API App based on ASP.NET Web API 2 using the Azure SDK Tools in Visual Studio 2013 which you should definitely watch before reading this post.
Well, deploying stable stuff is pretty neat.
But my first thought of course has been "What about ASP.NET MVC 6 on DNX beta 4?".
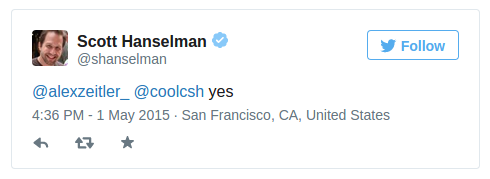
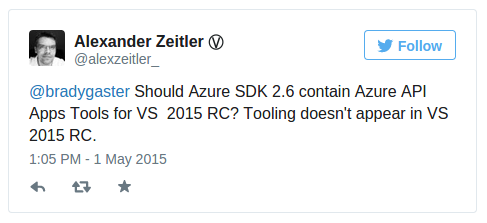
So I asked the lesser Scotts at Twitter:

Scotts answer was pretty promising:
My next step of course was installing Azure SDK 2.6 for Visual Studio 2015 RC and trying to create a new Azure API App as shown in the video above.
But there were no templates... so back to Twitter - this time Brady Gaster was my victim:
No promising answer but at least some facts :)

Ok, lets do some reverse engineering using Visual Studio 2013 and Azure SDK 2.6 and find out what happens when you're using the SDK tooling - I'll skip this step here and show you, how to get stuff done in Visual Studio 2015 RC and ASP.NET MVC 6 on DNX beta 4 now.
First things first, the ASP.NET MVC 6 API
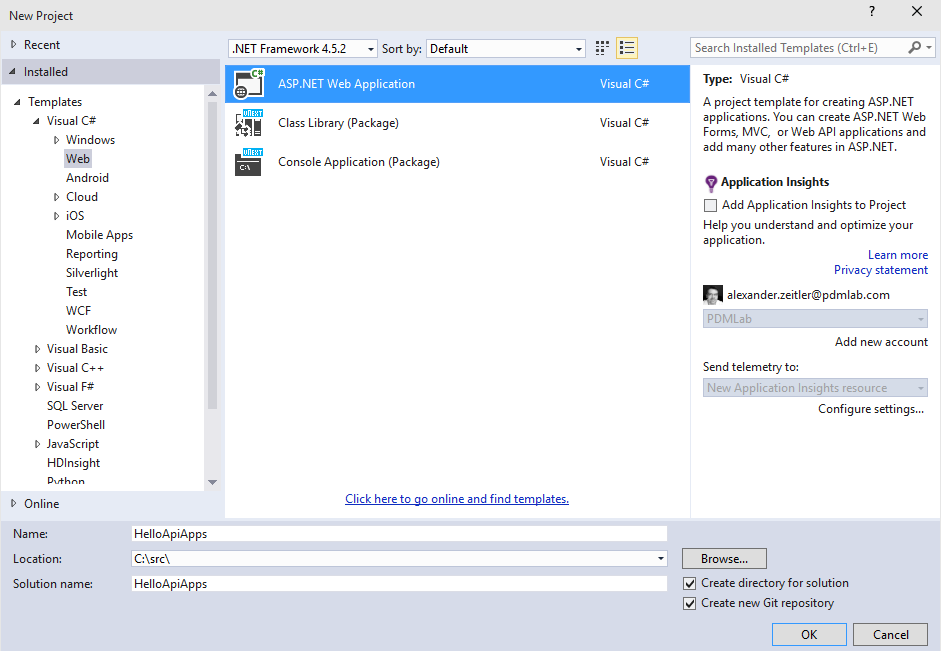
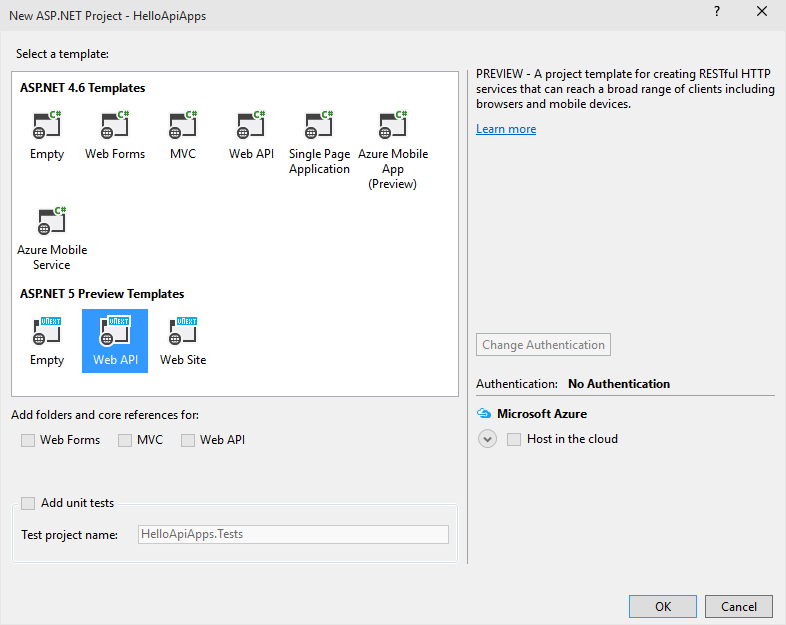
First, create a new ASP.NET Web Application in Visual Studio 2015 RC:
After this, your solution should look like this:
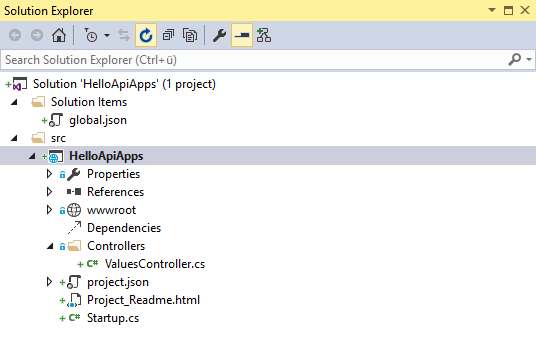
As the default ValuesController.cs in the Controllers folder is pretty useless (and it will cause problems as you can read later on), we'll delete it and create a SpeakersController.cs instead.
SpeakersController.cs:
using System.Collections.Generic;
using HelloApiApps.Models;
using Microsoft.AspNet.Mvc;

namespace HelloApiApps.Controllers
{
    [Route("api/[controller]")]
    public class SpeakersController
    {
        [HttpGet]
        public IEnumerable<Speaker> GetAll()
        {
            return new List<Speaker>
            {
                new Speaker
                {
                    Id = 1,
                    FirstName = "Scott",
                    LastName = "Hanselman",
                    Twitter = "shanselman"
                },
                new Speaker
                {
                    Id = 2,
                    FirstName = "Scott",
                    LastName = "Hunter",
                    Twitter = "coolcsh"
                },
                new Speaker
                {
                    Id = 3,
                    FirstName = "Damian",
                    LastName = "Edwards",
                    Twitter = "DamianEdwards"
                }
            };
        }
    }
}
We also create a folder Models and create a Speaker.cs in it:
Speaker.cs:
namespace HelloApiApps.Models
{
    public class Speaker
    {
        public int Id { get; set; }
        public string FirstName { get; set; }
        public string LastName { get; set; }
        public string Twitter { get; set; }
    }
}
At this time, you should be able to test your API locally at http://localhost:someport/api/speakers and you should get the JSON representation of our speaker list.
Creating the Swagger API definition file
According to the Scott's video we now would create the Swagger file, but Swashbuckle shown in the video doesn't work with ASP.NET MVC 6 right now.
To the rescue, there's already a work in progress project on GitHub which is porting Swashbuckle to ASP.NET MVC 6: Ahoy!
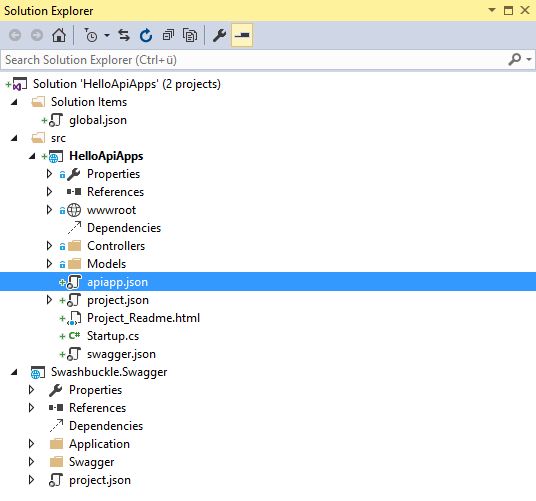
We create a local clone of Ahoy and for the sake of keeping this post simple, we add the Swashbuckle.Swagger project inside our API Solution as existing project:

Next, we have to register Swashbuckle / Swagger inside our Startup.cs
Startup.cs:
using System;
using System.Collections.Generic;
using System.Linq;
using System.Threading.Tasks;
using Microsoft.AspNet.Builder;
using Microsoft.AspNet.Hosting;
using Microsoft.AspNet.Http;
using Microsoft.AspNet.Routing;
using Microsoft.Framework.DependencyInjection;
using Swashbuckle.Application;
using Swashbuckle.Swagger;

namespace HelloApiApps
{
   public class Startup
   {
       public Startup(IHostingEnvironment env)
       {
       }

       // This method gets called by a runtime.
       // Use this method to add services to the container
       public void ConfigureServices(IServiceCollection services)
       {
           services.AddMvc();
           // Uncomment the following line to add Web API services which makes it easier to port Web API 2 controllers.
           // You will also need to add the Microsoft.AspNet.Mvc.WebApiCompatShim package to the 'dependencies' section of project.json.
           // services.AddWebApiConventions();

           services.AddSwagger(s =>
           {
               s.SwaggerGenerator(c =>
               {
                   c.Schemes = new[] { "http", "https" };
                   c.SingleApiVersion(new Info
                   {
                       Version = "v1",
                       Title = "Swashbuckle Sample API",
                       Description = "A sample API for testing Swashbuckle",
                       TermsOfService = "Some terms ..."
                   });
               });

               s.SchemaGenerator(opt => opt.DescribeAllEnumsAsStrings = true);
           });
       }

       // Configure is called after ConfigureServices is called.
       public void Configure(IApplicationBuilder app, IHostingEnvironment env)
       {
           // Configure the HTTP request pipeline.
           app.UseStaticFiles();

           // Add MVC to the request pipeline.
           app.UseMvc();
           // Add the following route for porting Web API 2 controllers.
           // routes.MapWebApiRoute("DefaultApi", "api/{controller}/{id?}");

           // Add MVC to the request pipeline.
           app.UseMvc(routes =>
           {
               routes.EnableSwagger("swagger/docs/{apiVersion}");
           });
       }
   }
}
The default Swagger URL for Swashbuckle has been (as shown in the video): http://somehost:someport/swagger/docs/v1.
By default, with Ahoy this has changed to http://somehost:someport/swagger/v1/swagger.json whereas in both cases v1 depends on the Version property being set during Swashbuckle registration in Startup.cs inside the ConfigureServices method in the code shown above.
Thus, we have to change the route definition back to the old format as Azure API Apps expect it in that format. You can see that inside the Configure method of the Startup.cs in the code shown above.
Next, we can open up our App in a browser again and browse to http://localhost:someport/swagger/docs/v1 and we should get the JSON representation.
Adding Azure API Apps Metadata
Now we need to add the Metadata for the Azure API Apps manually as we don't have the tooling support right now...
First, add a JSON file named apiapp.json in the root of the API App project:
Then paste this content into it:
{
 "$schema": "http://json-schema.org/schemas/2014-11-01/apiapp.json#",
 "id": "HelloApiApps",
 "namespace": "microsoft.com",
 "gateway": "2015-01-14",
 "version": "1.0.0",
 "title": "HelloApiApps",
 "summary": "",
 "author": "",
 "endpoints": null
}
Next, add the following folders and files to your wwwroot folder in the API App solution:

The content of the apiDefinition.swagger.json is the output from http://localhost:someport/swagger/docs/v1. Copy and paste it into the file.
Important Note: Make sure your API Controllers don't contain ambiguous method names (e.g. "Get" twice), this will cause problems at the moment. Thanks to @Mohit for sorting that out!
The last file required, is the apiappconfig.azureresource.json and it's content is this:
{
 "$schema": "http://schemas.management.azure.com/schemas/2014-04-01-preview/deploymentTemplate.json#",
 "contentVersion": "1.0.0.0",
 "parameters": {
   "$system": {
     "type": "Object"
   }
 },
 "resources": []
}
<Update [2015/05/02]>: Instead of providing a static snapshot of your Swagger API definition, you can also provide an endpoint where the current swagger definition can be read from. This solves two problems: the route can be the new route template Ahoy introduces and your Swagger definition is always up to date when add new API endpoints (Controllers / Methods).
Just update the apiapp.json and add an fill the endpoint property (please note that I'm use the new default Ahoy route here):
{
"$schema": "http://json-schema.org/schemas/2014-11-01/apiapp.json#",
"id": "HelloApiApps",
"namespace": "microsoft.com",
"gateway": "2015-01-14",
"version": "1.0.0",
"title": "HelloApiApps",
"summary": "",
"author": "",
"endpoints": {
      "apiDefinition": "/swagger/v1/swagger.json"
  }
}
Kudos go to @pkefal for the hint (By the way: if you want to create API Apps using Node.js you should definitely read his article)
</end of update [2015/05/02]>
Another step, the Azure SDK tooling does, is adding two NuGet packages and we have to do that also. Update your project.json and add Microsoft.Azure.AppService.ApiApps.Service and System.IdentityModel.Tokens.Jwtto it.
{
 "webroot": "wwwroot",
 "version": "1.0.0-*",

 "dependencies": {
   "Microsoft.AspNet.Mvc": "6.0.0-beta4",
   "Microsoft.AspNet.Server.IIS": "1.0.0-beta4",
   "Microsoft.AspNet.Server.WebListener": "1.0.0-beta4",
   "Microsoft.Azure.AppService.ApiApps.Service": "0.9.40",
   "System.IdentityModel.Tokens.Jwt": "4.0.2.202250711",
   "Microsoft.AspNet.StaticFiles": "1.0.0-beta4",
   "Swashbuckle.Swagger": "1.0.0-*"
 },

 "commands": {
   "web": "Microsoft.AspNet.Hosting --server Microsoft.AspNet.Server.WebListener --server.urls http://localhost:5000"
 },

 "frameworks": {
   "dnx451": { },
   "dnxcore50": { }
 },

 "exclude": [
   "wwwroot",
   "node_modules",
   "bower_components"
 ],
 "publishExclude": [
   "node_modules",
   "bower_components",
   "**.xproj",
   "**.user",
   "**.vspscc"
 ]
}
Publishing the API App
If there were tooling support, you could create a new Azure API App using the tooling. Yet: no tooling, thus we have to use the new Azure Portal.
Login using your credentials and create a new Azure API App.
Disclaimer: Depending on your plan and the settings, this will cost you money!

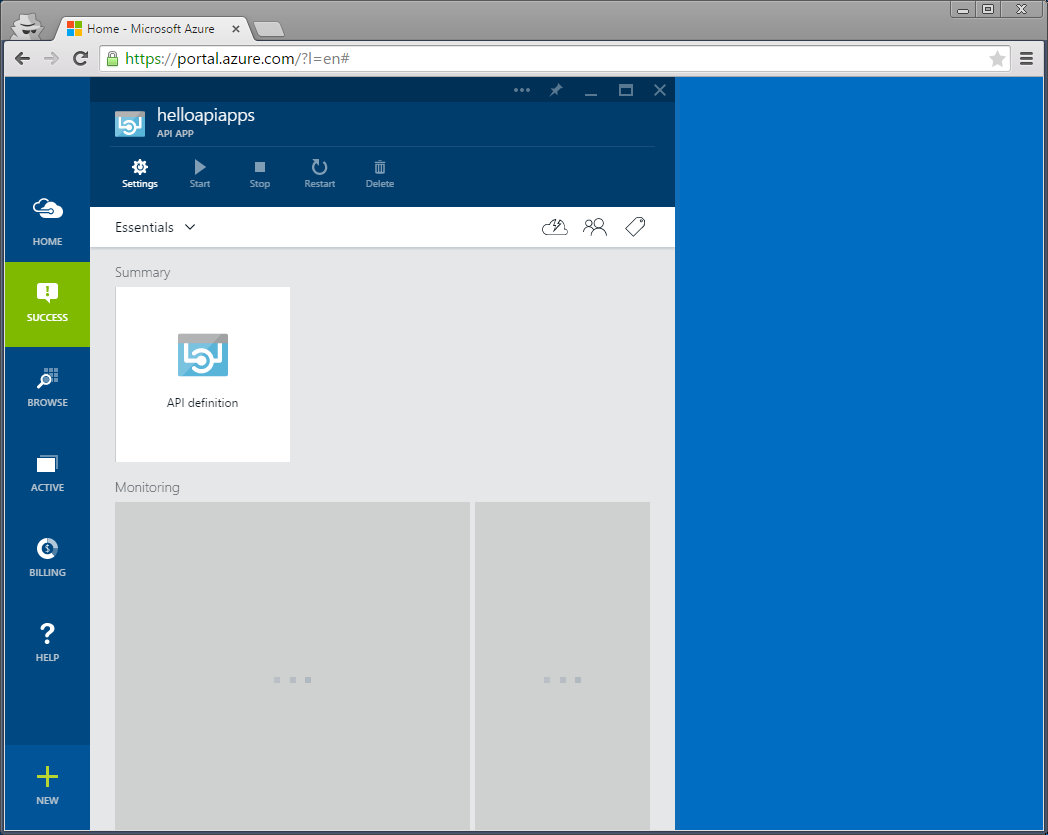
After a few seconds, you'll get the success notification inside the Azure Portal and you should have a new tile on the Portal startpage and clicking on it should get you some details:
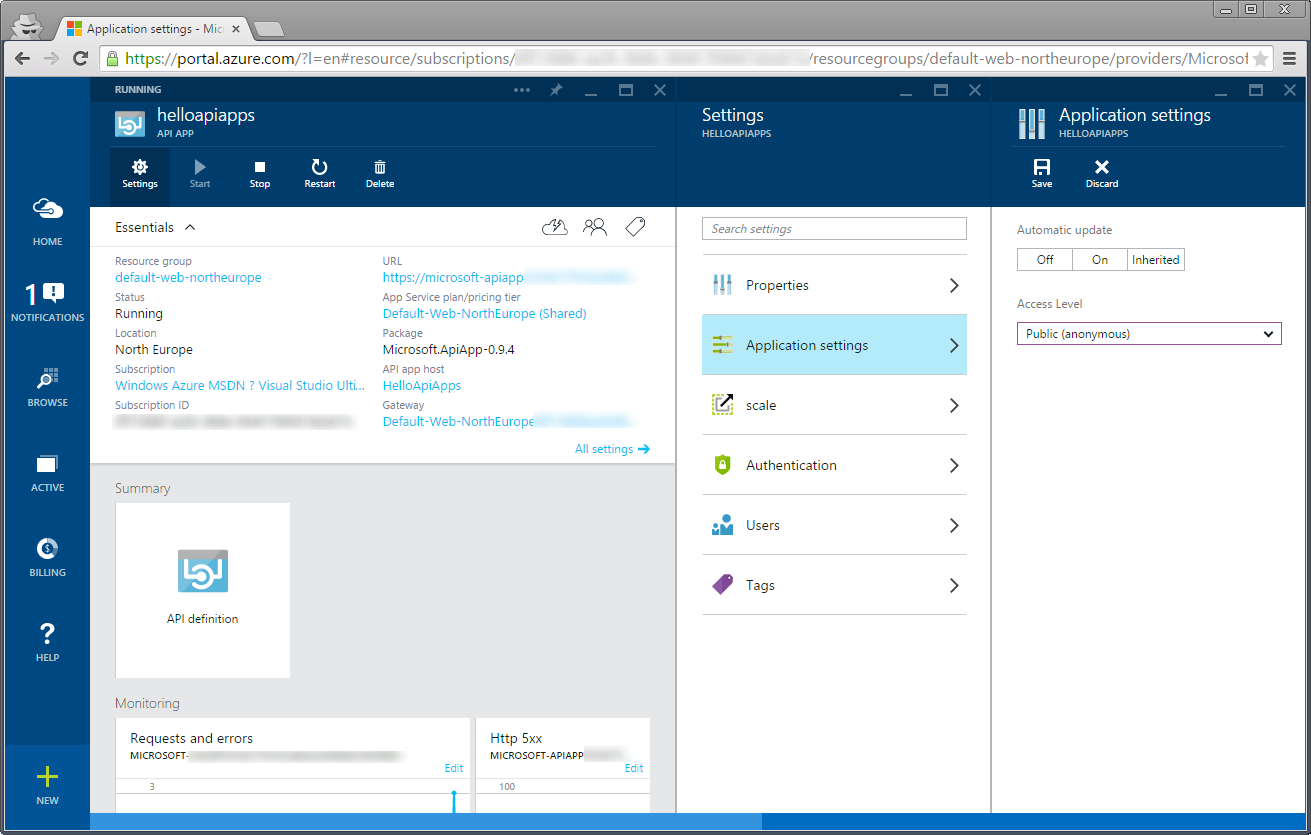
Now make sure to set the "Access Level" inside the "Settings" / "Application Settings" to "public (anonymous)" and click the "Save" button afterwards:
Back to Visual Studio 2015 RC, we can now publish our Azure API App by right clicking the project and selecting "Publish...":

The next dialog allows you to select where to publish:

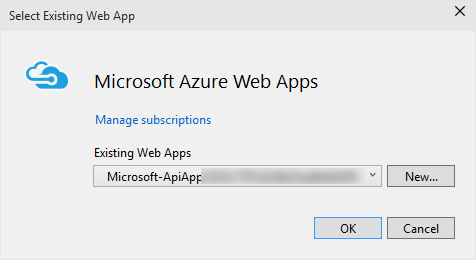
Select "Microsoft Azure Web Apps" and click "Next".
Now from "Existing Web Apps", select the API App you just created inside the Azure Portal and click "OK":
The next dialog sums up the connection details and can be confirmed with "Next":

During the next step, you can choose your DNX version to be used for the API App - the defaults are ok, click "Next":
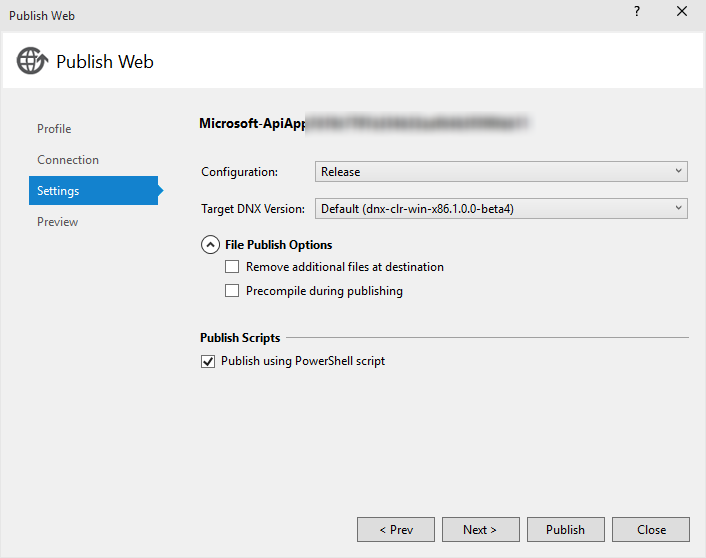
The last step is to hit the "Publish" button:

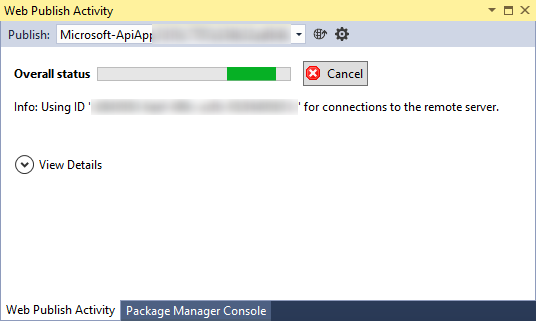
The publishing process should take only a few seconds:
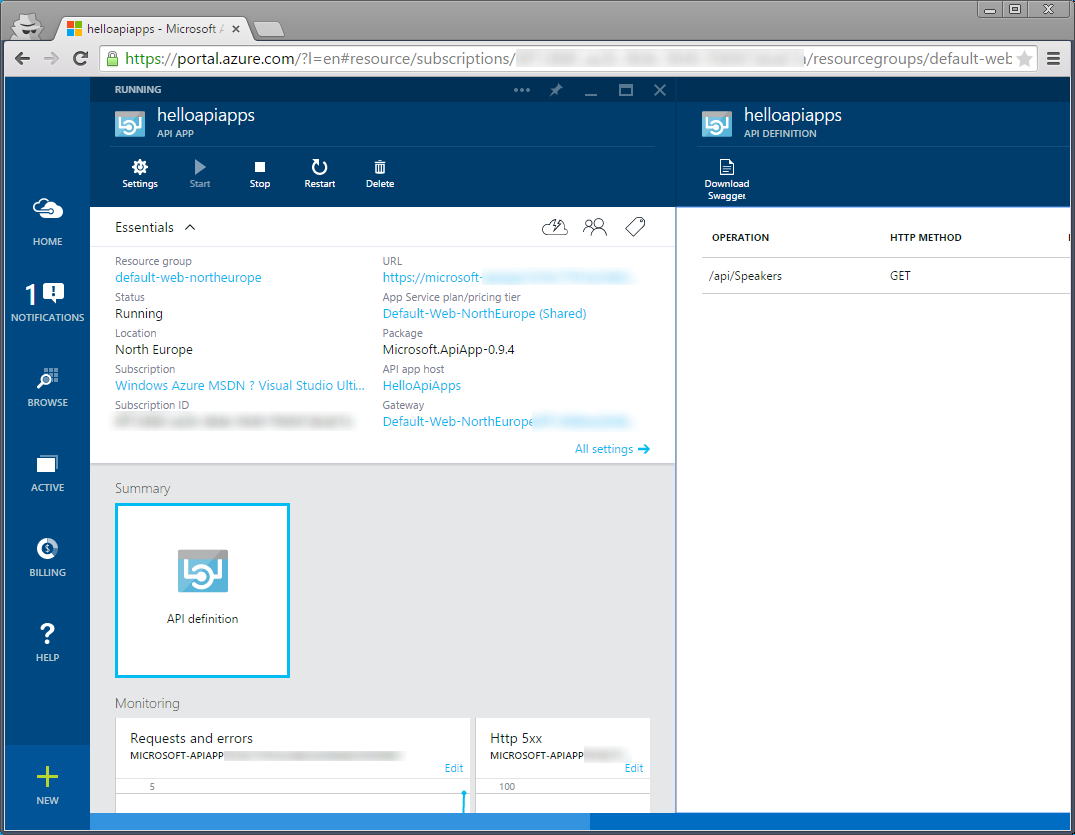
When it is finished, it should open up your default browser showing you this:

Back to the Azure Portal you should now be able to click on the "API Definition" tile and see the API Operations and be able to download the Swagger using the button above the list of Operations.
That's it!